Tampilkan postingan dengan label halloween. Tampilkan semua postingan

Senin, 31 Oktober 2011

Candy Corn Mousse

Throwing a little get together tonight? Then I have the perfect last minute Halloween treat for you! These Candy Corn Mousse Cups are not only decadent, but adorable too!


Ingredients
1 package (8 oz.) cream cheese, softened
½  cup powdered sugar
¼ cup milk or cream
1 teaspoon vanilla
1 small container (8 oz.) Cool Whip, thawed
orange and yellow food color
candy corn
Directions
Beat cream cheese in the bowl of a stand mixer until fully smooth. Slowly add powdered sugar, add milk and then vanilla. Continue mixing about 1 minute on medium speed. Fold cool whip into cream cheese mixture; stir until fully combined.  Scoop about 1/3 of the cheesecake mousse into a bowl; mix with orange food coloring. Color another third of the mixture yellow. Leave the remaining third white. Beginning with the yellow mousse, pipe or spoon the mixture into each glass. Repeat with the orange and white. Garnish with candy corn.
Yield: 8 mini servings.
 Source: Glorious Treats

Selasa, 25 Oktober 2011

A bonanza of Halloween printable labels

Want to thrill the kids with creepy Halloween treats? Hostess with the Mostess is offering a huge array of well-designed labels for gross party food. (Well, gross, but not as gross as this. Shudder.) Get jar and candy labels here and drink labels and flags here.

Jumat, 21 Oktober 2011

Cheap, trash bag Halloween decorating

In a burst of festivity, I decided we should have some Halloween decorations in the house. Something 1) dramatic, 2) super cheap, and 3) didn't require me to go to the store. Behold: trash bag spiderwebs.

To make these, lay a trash bag out flat. Trim off the sides and bottom so you're left with two big rectangles of plastic. Cut each piece into an approximate square (eyeballing it is fine.)

Fold one of the squares in half diagonally to form a triangle. Fold that triangle in half two more times. This is slippery stuff, so use a few pieces of tape to fasten the layers together on the loose side. It will help hold the shape together when you're cutting. If any of your tape pieces end up on the web itself after you've cut it out, remove them before unfolding.

If winging it makes you nervous, use a black Sharpie to sketch some guides on the plastic: draw a "stem" from the folded point out to the end of your triangle. Then sketch some scallops that come off the stem. With a scissors, cut out the negative shapes and unfold your web. Tape several webs together and add extra strips of plastic to connect them if you like.

Kamis, 20 Oktober 2011

Halloween printables: free invitations and papertoys

You and the kids can print and assemble cute (and free!) Halloween goodies, compliments of the generous people of the internet. Get a massive "Boo"-themed party set by Love Party Printables, featured at Catch My Party. Or make paper Frankensteins by Bob Canada. Find a Halloween treat box template from Draw! Pilgrim—the link is at the bottom of Pilgrim's post.

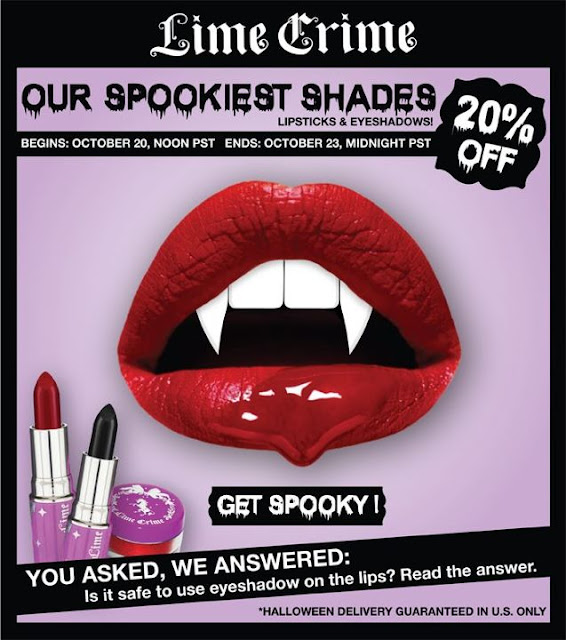
Lime Crime Halloween Sale!

Senin, 17 Oktober 2011

Angelic Pretty Twinkle Witch Set

OOooh this is soo cute! I didn't know Angelic Pretty made Holiday themed outfits, but apparently they do for Halloween. This is great because unlike traditional Halloween costumes, especially the slutty ones, this set is  still acceptable throughout the year, not just October....
Well, you may want to lose the hat.
The whole outfit including dress, cape, hat, brooches, and arm warmers will run you about $450.
 

Kamis, 13 Oktober 2011

How to make origami bats

Wet-fold realistic 3D bats for Halloween! Michael LaFosse has a video demonstration at the Peabody Essex Museum's origami site. To get to the bat video, click "Fold more models," then "Origami Now" and you'll see the "Happy Goodluck Bat." (They will ward off the zombies and vampires that might try to get you.)

Even if you don't make any bats yourself, it's mesmerizing to watch an expert do origami. He makes it look so easy, with none of the consternation, fumbling, and frustrated sighs I like to incorporate into my origami attempts.

Sabtu, 08 Oktober 2011

Martha Stewart Jack O'Lanterns

No matter how good you are at something, 
there is always that one "Martha Stewart" in the world that's better than  you.
Witch Carousel
Pumpkin Raccoon
Cat Pumpkins
Owl Pumpkins
   source

Senin, 03 Oktober 2011

Free halloween papercraft calendar

The ladies and gentlemen of Scout Creative (you might remember them from their previous incarnation, The Curiosity Group) have released another printable calendar of the month. October's build-it-yourself edition features a collection of spooky heads, arms and bodies. Mix and match to make your own hideous little creature. Get it here!

Sabtu, 01 Oktober 2011

Happy October!

Yaay! The Fall season is here! I hope everyone has a spooky and cooky October and a Happy Halloween!
 Stay safe!

Jumat, 23 September 2011

Halloween Cake Recipe

This month I decided that I would be diligent with my blogging and post something useful for this month's holiday well in advance, instead of the night before. Soooo, I stumbled across the most awesome Halloween cake on Bakingdom.com
This recipe is taken straight from the Bakindom site and was posted by someone named "SugarBear". 
If anyone tries this recipe please send sassyNpunk a picture at support@sassyNpunkBoutique.com or add it to our Flickr pool!
Enjoy!
These little fondant pumpkins turned out to be the most fun to make! My goodness, these are adorable! And unbelievably easy too! I had planned on maybe doing some little ghosties because they’re so simple, but I did these instead, on the advice of my sister. She was totally right…these are perfect!
 
If you want to make some, it’s not difficult at all. Just roll a piece of fondant into a ball or oval, then set it on a counter that is very lightly dusted with sugar. Gently press the very top of the pumpkin down in order to flatten the bottom and make the pumpkin less perfectly round. Next, press a small round tool (I used sculpting tools) into the top of the pumpkin to mark a place for the stem. For the “stripes” around the pumpkin, use a toothpick to gently press into the fondant, at even intervals, all the way around.
For the stem, shape a small piece of green fondant into a cone or cylinder. Put a tiny dab of water on the end and gently press it into the indentation on the pumpkin. For a more elaborate stem, elongate it by rolling it gently through your fingers. Press it to the pumpkin, as before, but shape the end so that it curls in a fun way. Since the pumpkin is so small, it will hold it’s shape easily. Last, but not least, use a black food write to draw the funny faces on!
Okay, so the pumpkins are fun, but check this out:
Is this cool or what? Rather than just do two or three layers, I thought that a bunch of thin layers would be more interesting, and a fun surprise when the cake is cut! To do this, I used one basic batter, then divided it in half. One half had chocolate added to it, while the other got orange flavor. Then I simply baked the layers in small batches until I was out of batter! I used eight-inch pans, lined with parchment, each filled with about two-thirds of a cup of batter. It only took about ten minutes for them to bake, and I was able to do two layers at a time. I wouldn’t recommend putting layers on the top and bottom racks of the oven, because they will not bake evenly.

Once all of the layers have cooled, start stacking them!

I started with orange on the bottom, then frosted the top of it with the chocolate filling (sorry for the poor quality photo). I spread the frosting to about one-inch from the edge of the cake. If you spread the filling all the way to the edge, it will probably mix with your orange frosting, so leave that one-inch ‘barrier’ in there (the orange frosting will fill it in). Next, layer a chocolate layer on top and frost it like you did the orange layer, then just repeat that process until you’ve used all of your layers.
Once you’ve got the whole cake stacked, you can frost it with the orange frosting and decorate, as desired! I love how really festive the inside looks!
This cake could easily be altered to suit any holiday! It wasn’t difficult to make at all, but you do need to devote at least an hour to baking it, since so many layers to cook. It’s really completely worth the time and effort, though! And you can make the design as minimalistic or as frilly as you like!! Definitely give this fun cake a try! Enjoy!


Chocolate Orange Layer Cake

with Chocolate Filling and Orange Buttercream Frosting

Topped with Chocolate Ganache
Makes 1 10-layer, 8-inch round cake
Ingredients


FOR THE CAKE

1 cup (2 sticks) unsalted butter, softened

2 cups sugar

3 eggs

1 teaspoon vanilla

3 cups all-purpose flour

1 teaspoon baking soda

1/2 teaspoon baking powder

1/2 teaspoon salt

1 lb. sour cream
For the orange layers:
1 1/2 teaspoons finely grated orange zest

1/4 cup fresh orange juice
For the chocolate layers:
1/2 cup boiling water

1/2 cup cocoa powder
Food coloring, if desired


FOR THE FILLING

1/4 cup boiling water

1/4 cup cocoa powder

4 tablespoons (1/2 stick) unsalted butter, softened

3 1/2 cups confectioners’ sugar

1/2 teaspoon vanilla

2 tablespoons milk, as needed


FOR THE ORANGE BUTTERCREAM

6 tablespoon unsalted butter, softened

5-6 cups confectioners’ sugar

1/4 cup fresh orange juice

1/2 teaspoon vanilla

1/2 teaspoon finely grated orange zest

2 tablespoons milk, as needed


Chocolate Ganache
Marshmallow Fondant


To make the cake: Preheat oven to 350 degrees. Line up to 10 8-inch round pans with parchment.
In a small bowl, combine the boiling water and cocoa powder; set aside to cool.
In a medium bowl, combine flour, baking soda, baking powder, and salt; set aside.
In a large bowl, or the bowl of a standing mixer, cream the butter and sugar together until light and fluffy. Add the eggs, one at a time, until combined, scraping the sides of the bowl, as needed. Stir in the vanilla. Sprinkle 1/3 of the flour mixture into the bowl and beat until just combined. Add half of the sour cream, mix until combined, then scrape the bowl. Repeat with the remaining flour mixture and sour cream, mixing until everything is combined.
Divide the batter in half evenly. To one half, gently stir in the cooled cocoa mixture until combined. To the other half, stir in the orange zest and juice until combined. Add orange and/or black food coloring to the different batters, if desired. Place about 2/3 cup of batter into each pan, alternating between the 2 flavors, until you have an equal amount of chocolate layers versus orange layers. Bake up to 3 layers at a time for 10 minutes. Cool completely before stacking and decorating.
To make the filling: In a small bowl or measuring cup, combine the boiling water and cocoa; set aside to cool. In a large bowl, cream together the butter and about a third of the confectioners’ sugar. Stir in the cocoa and mix thoroughly before beating in another third of the confectioners’ sugar. Next stir in the vanilla and the remaining sugar, beating until well mixed and light and fluffy. Add more milk, as needed, if the frosting is too thick. Add coloring as desired.

To make the frosting:
In a large bowl, cream together the butter and 2 cups of the confectioners’ sugar. Stir in the zest and juice, and mix thoroughly before beating in another 2 more cups of the confectioners’ sugar. Next stir in the vanilla and the remaining sugar, beating until well mixed and light and fluffy. Add the milk, as needed. Add coloring as desired.
recipe by Sugarbear

Selasa, 20 Oktober 2009

Skeleton papercraft project

I printed out and assembled this little skeleton-zombie guy just for kicks. At 2 1/2" tall, he's a very threatening presence. I believe he might enjoy hiding in the medicine cabinet or the cereal cupboard. To make him (he's part of the "Halloween Night" set), and other Halloween papercrafts, visit Canon's Halloween printables site.

Update for those having trouble finding the template: Click here. Scroll down to "Halloween Decoration" and find "Halloween Night." This printable document contains many characters (cat, pumpkin, etc.) and a house you can build. The skeleton is on one of the pages. Click A4 or Letter, depending on what your country's standard paper size is, to download the PDF. When the template is downloaded, print page 3, the instructions, and page 8, the skeleton body parts.

Senin, 12 Oktober 2009

Painted pumpkin ideas

Check out the cool painted pumpkin ideas over at Parents magazine. I like the white versions for their untraditionalness. Untraditionality. Nontraditiation.

(Images by James Baigrie for Parents)

Kamis, 08 Oktober 2009

Spooky packing tape transfers

Here's a quick and easy Halloween project: votive candle holders with packing tape transferred images. You'll need clear packing tape and access to a laser printer to make these.

First, select the image you'd like to apply to your candle holder. (Check here for scary vintage clip art, like this spider, bat, crow, skull, aardvark, or search the database for other illustrations.)

With a laser printer, print your images out 2" high (or to fit within the size of the clear packing tape you have.) An inkjet printer won't work for this project, so don't even think about it!

Laminate the front of your image with packing tape. Use your thumbnail to burnish your image onto the tape, making sure the parts with toner are stuck down well. Then trim the picture down to size. You can either cut carefully around your image now, or just cut out a square and trim it later. Doing it now is probably easier.

Soak the image in a bowl of warm water for ten minutes. Then rub the wet paper fibers off the back until you're left with just clear packing tape and toner.

The tape will still be slightly sticky, so you can directly apply it to a candle holder, or for a more permanent solution, adhere it with Mod Podge, acrylic gel medium, or other glue.

Jumat, 31 Oktober 2008

Happy Halloween!

If you like Halloween, I'm pretty sure you'll need to immediately download some wallpaper and get your computer looking festive. Pick from this big gallery at Smashing Magazine, or grab Eleanor Grosch's latest creations.

And then if you need a last minute card, download this freebie designed by Emily at Inside a Black Apple.

Senin, 06 Oktober 2008

Pumpkin decorating ideas

I've sifted through the magazine sites and rounded up some unique pumpkin carving, painting, and decorating tutorials. For your inspiration:

Hallmark's Fantasy Pumpkins (above)
23 Pumpkins to Paint and Decorate at Better Homes and Gardens
More pumpkin decorating ideas from Martha Stewart
Martha's Papier-Mache Pumpkins (not real pumpkins, but I'll include them because they're cute!)
Sunset Magazine's Leafy Pumpkins (love the Harlequin designs)
A gallery of No-Carve Pumpkins at Good Housekeeping
Country Living's Unique Pumpkin Carving Ideas

And if you're looking for pumpkin carving stencils, check out this post from last year.

(Image from hallmarkmagazine.com)

Selasa, 30 Oktober 2007

Halloween photo fun

Happy Halloween! For your enjoyment, some delightfully creepy images:

This photo is from the Barbie Murders series by etsy seller Wildemoon. Buy a print here or see the other tragic Barbie victims.

Here's an entry in the "Deadly Cute" Photoshop contest at Worth1000, where innocent little animals are retouched into nasty creatures. Via Boing Boing.

Jumat, 05 Oktober 2007

Pumpkin carving stencils

Blog reader Christina emailed me about these cool World Wildlife Fund pumpkin stencils you can download from HP right here. Which prompted me to search for more downloadable stencils. Check these out:

• Stencils from Hersheys and Pumpkin Masters
• Some nice carving and decorating ideas from Parents.com
• Some odd, dramatic, and/or gruesome carving ideas at Extreme Pumpkins (here's my fave)
• Tips on everything from carving to lighting to photographing your jack-o-lantern at Pumpkin Carving 101

(Images from HP)